I’ve asked Kara Fidd from Simplifying Design who is a genius when it comes to creating tripwires for sale on blogs to give us a tutorial on creating a tripwire product in Canva.
Kara makes some of the most beautiful Canva templates for digital products, and her designs convert like crazy!
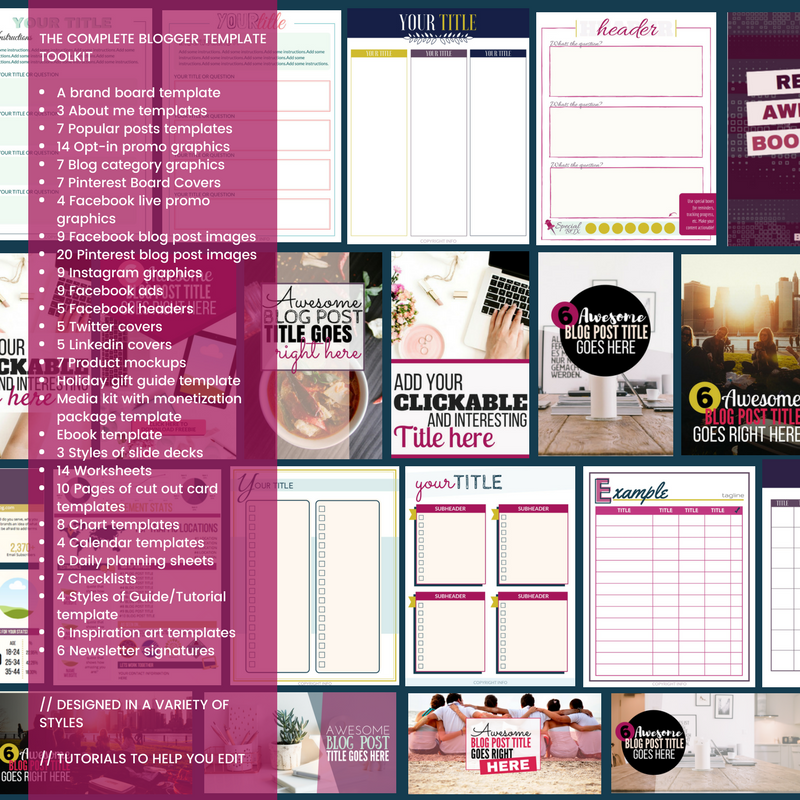
After you finish reading, if you’d like some proven templates to get started on your tripwire journey, Kara offers a stunning set of Canva templates you can use to create printables in her Complete Blogger Template Toolkit.
She also offers a membership style option where you can get all new designs each month in the DIY Design Creator’s Vault. Both are great options if you don’t want to have to start from scratch yourself!
If you want to monetize your blog fast and have a creative mind for content, this is the post you need to read to get that ball rolling ASAP.
Take it away, Kara!

Tripwire 101 – What is it? How do you sell one?
Before we get too deep into how to create a tripwire, let’s talk about what a tripwire actually is.
A tripwire (in the blogging sense) is a product, normally digital, a reader has an opportunity to buy after subscribing to your email list. AKA a limited time offer that they can take advantage of as a new subscriber.
They are usually discounted heavily from full price, making them super easy products to sell and a fantastic way to make money from blogging!
You’ve probably seen them before, but didn’t even realize it.
Imagine coming across a great blog post in a subject you’re passionate about and seeing an opportunity to get a list of 10 more ways to grow in that area. You enter your email in to receive the list, and the page automatically takes you to another page where you have the opportunity to purchase an entire e-book on the subject. The idea is that they get this item for a very steep discount (for a limited amount of time) as a thank you for joining your email list.
So, basically, it works is by:
- First pointing people to your free resource.
- Next, they sign up to get your freebie which is delivered via email.
- Finally, after they finish signing up through your opt-in form, they are redirected to a thank you page that sells the tripwire product at a highly discounted rate.
That’s a tripwire sequence in a nutshell — a sequence of opt-ins and pages that lead to the opportunity to purchase.
This strategy is so easy to implement, and it’s the perfect revenue generator for busy entrepreneurs who need to generate revenue from home.
An Easy Way to Make Money Blogging
Tripwire products are the best way to monetize your blog on autopilot—this is how you make money blogging!
The best part about tripwires is that they’re a “set and forget it” type of passive income. Once set up, you can essentially forget about it and focus on growing your list, working on other digital products, or growing your traffic. Whatever your goals are, a tripwire can help you make money while you work on your next step.
What does this mean? Essentially it means that there’s no need to launch a major product and no need to continue trying to “sell it”.
How to Make Money Blogging Selling Tripwires
Everyone wants to know how to make money blogging, but the logistics of it can be a bit tricky.
The number one problem I see most people have when creating their tripwire product is that they have no idea how to actually create or design it. This tutorial is going to walk you through that process, step by step, using Canva.
There are so many types of tripwire products, including (but not limited to):
- Ebooks
- Workbooks
- E-courses
- Workshops
- Strategy guides
- Bundles of smaller products
For this demonstration, we will design an ebook with a worksheet page.
Fun fact: we actually only need to use two different tools in Canva 0. This isn’t hard or scary, I promise! For this design, we will use the shape tool and the text tool.
How to Easily Create a Tripwire in Canva
Let’s start with the cover:
I’m going to choose a US letter size for this ebook. Your ideal size may vary depending on where you are located.
Once you have a blank document opened up, we will select the solid square tool to create a visual element on the page. I will enlarge it to fit the screen and then choose a brand color.
White space is our friend! We don’t want our design to take up too much ink if someone decides to print and we don’t want the design to be visually overwhelming. For those reasons, I’m going to make sure that the background square is a very light color, Then, I’ll add another square shape (the outlined one) to create a thin border.

Next, we will add our title. I generally recommend sticking to your brand fonts and colors. This not only helps save time in the design process but will also help you create a recognizable brand for your blog.
Don’t make the title too busy or confusing—a short and to the point title that is big and easy to read will do the trick. If you want to add some other visual on-brand elements that tie into your product, that’s fine, but remember that sometimes less is more!
In general, I don’t advise using more than 2-3 fonts and 2-3 colors per design.

In this example, I’ve used a total of 3 fonts (two of them being the same font in different variations) and 3 total colors.
Now that we have the cover finished, it’s time to move onto the content.
What to do for Tripwire Content
Depending on the type of product you are creating, you may want to include a copyright page.
For me, this is a pretty standard page. Once I have the layout though, I carry it through to the rest of my content pages by clicking on the “duplicate page” button and changing up the content. This allows you to have the same overall layout without having to start from scratch with each new page.

Prior to designing any workbook or ebook, I like to have my content already written out and outlined so that I can better visualize what needs to go where and how I want the pages to look. As I start designing in Canva, I’ll copy and paste my text and format as I go.
I also choose a specific style for the header and the subheaders to use throughout the project. Each time I start a new section, I simply copy and paste the header and subheaders from other portions of the book.
While this takes time and practice like anything else, once you have the flow of it, it’s incredibly simple and will allow you to format professional products with ease.

As you continue adding in your content, you’ll just keep duplicating the pages and formatting the text. Once you are ready to change up the style and layout, we will start adding more shapes.
To illustrate this, let’s create a worksheet page.

Now that you have your product finished, you can click on “download” and choose “PDF”.

There you have it! Your tripwire product has been created in Canva!
How to Automate Selling Products from Home
Now that it’s downloaded to your computer, you will need to set up the automation.
This will depend on the tools that you use and the way that you sell things. I have personally used SendOwl and Teachable to sell my products. Other bloggers use things like Shopify or Thinkific.
Tools for creating a sales page include (but are not limited to):
- Leadpages
- Thrive Architect
- Brizy
- Elementor
Once you have your sales page created, you simply need to grab the URL and input it in the thank you page “redirect” section of your email service provider. In ConvertKit, it looks like this:

After I created my first tripwire product, I was able to start generating an income right away (even though my blog was brand new!)
Since a tripwire product doesn’t require a launch or an email list to get started, you can create one at any point in your blog career.
As a side note: it does help to be at a point in your blog that you truly know and understand your avatar so that you are able to create something that they will buy.
As you brainstorm who your ideal customer is and the perfect tripwire for that audience, keep in mind that you want to be able to solve their problem and provide value by offering it as a steep discount.
Tripwire sales are generated based on new sign-ups, so once you are getting consistent subscribers, it’s time to start creating! Then, you can shift your focus back to other parts of your blog while you make money passively.
After your tripwire is set up, you can focus on creating more high quality, keyworded content that will bring in more subscribers (and more eyeballs on your tripwire sales page).
You can also focus on things like ad income from blog post content, tweaking your tripwire sales page to increase conversions, and creating other digital products for your niche.
Before you know it, you’ll not only know exactly how to make money blogging, but you’ll be scaling it with tripwires, the easiest products to create from home!
